The Video: May Favourites 2014


So this happened.... I made my first YouTube video! I've been wanting to make videos for a really long time but the idea of sitting in front of a camera and talking just seemed so foreign to me so I always put it off, but I finally just did it. Oh, and not to mention that I had no clue how to edit (edit fails are bound to occur in my videos ha!) Thankfully, after watching a few tutorials, a video actually came together. I decided to go for the classic Monthly Favourites so I hope you enjoy some of my picks.

Please subscribe to my YouTube channel for more videos coming up soon and if you have any video suggestions, I'd really appreciate them! 

Let me know what you think!

post signature

Faith Friday: It Takes Two


Whether you're single or not, let's just get straight into it and clarify that our relationship status is taken. The most important relationship in our lives is the one we build day after day with our Heavenly Father! But there's just one thing I want to remind you of - it takes two to dance. Like in every relationship, both people need to be in agreement and in the same spirit. They have to work together to grow in their relationship and nothing will get done successfully if one person is the one doing the heavy lifting. My point with this example? Don't let your relationship with Christ be one sided. He's pursuing you, but you need to do the same! 

It's very common to hear people talking about the fact that God is with them at all times and that He will never leave them, but what kind of relationship are you building if you aren't willing to do the same on your end? It is of the utmost importance that you give it YOUR all. It's not enough to say that He is with you when the relationship relies on the fact that you can say, "I'm near to you, too!" The connection we build with God is based on constant give and take. As he pours out of His love into you, you respond by giving your love and affection back. There's nothing more beautiful than that dynamic! 

I find that often times we go through seasons of not investing into our relationship with Christ. This all gets extra complicated when the reason behind it is the fact that we're investing more into our other relationships. Just know this, the more your connection with Christ grows, the more you can better love people in your other relationships. Never buy into the lie that you're wasting your time giving your all to God, because the product of that sacrifice is more than you could ever achieve through your own strength. Period. 

For my single ladies, stop being so worried about getting into a relationship when you already have one that should be keeping you busy! If you feel like developing a relationship with Christ is too easy, then you probably need to reconsider how much effort you are actually putting in. It may seem simple when you're the one receiving, but as soon as you see how much it takes to give as much as you get, well, your ideas may just change! Investing in God means investing in your future. One that is bright, filled with love, and so promising. So respond to Him, just like you would if you were establishing something with potential life partner. When God calls, pick up the phone. Set apart some time to talk everyday. Go on dates. I am 100 percent sure that if you can play your part in your relationship with Christ, you will be more than prepared to do the same when the right person comes along. Just remember, when someone does come along, it's not an excuse to place God on the side. Now you have yet another relationship to invest in, but don't lose sight of the fact that God was there from the beginning, He's your #1. If the person you potentially want to date doesn't understand that, then we've got another issue on our hands. 

It takes two. No matter what stage of life you're in right now, be mindful of the fact that you need to respond to Gods love. Stop giving Him the scraps and leftovers, the only thing He deserves is your very best. As He gives to you, give it all back in thankfulness. 

Enjoy the weekend! x

post signature

Dealing With Second Day Hair...

Whether it's second day, third day, or any day hair, the struggle to keep your tresses looking fresh is one we all go through! From personal experience, I'll be the first to say that having an oilier scalp can be incredibly annoying when you want to look presentable but don't have time to wash, dry, and style your locks. On days like these, dry shampoo is your very best friend, and I've found one that I really love! 

I've tried so many different dry shampoos and I feel like my complaints with most of them are the same: they leave your hair sticky, sometimes even greasier than you started with and you get that dreaded white dusty look at the scalp. Not a good look, ladies! Well, I think I've found a winner. Tresemme Fresh Start Volumizing Dry Shampoo delivers that same oil-sucking effect, while leaving your hair smelling fresher, giving you some lift, no greasy residue and none of that white finish. Not only is affordable but it beats out some higher end options by a long shot. (It's on Rollback at WalMart - go get yourself a few cans!)

While at Winners a few months back I found some Oscar Blandi products and saw that there were a few bottles of their Pronto Invisible Volumizing Dry Shampoo Spray! In comparison, while both claim to do the same thing, I think Tresemme delivers more. The Oscar Blandi left my hair somewhat sticky feeling and although it was invisible, it did nothing to lift my hair up a bit with volume. So, I'm pretty glad that the more affordable options works out better. I looked into it and found that I think Oscar Blandi has reformulated that dry shampoo, anyone tried the newer version?

As the daughter of a hair stylist, I haven't really done my own hair until quite recently (my mom wouldn't dare let me mess up my own hair haha!) and I've found a few ways to keep my hair looking cute even when it's not freshly washed. I have pretty fine, oily hair at the scalp so it can be difficult to disguise even second day hair but what I like to do is spray in some dry shampoo into my roots, flip my head over and then run my hands through and distribute the product near the scalp. In terms of hairstyles, I like to either go for a high ponytail and then curl the ends a bit to give me a more put together look, or you can place your hair in a ponytail, tease the ends a bit and wrap your hair into a big bun. If you have longer hair then a sock bun would work nicely but for some reason no matter how long my hair is, I can't seem to get that little donut to work for me! 

I'd love to hear about what you do to keep your hair looking and feeling fresh once you've hit the second day. Any dry shampoos you think are incredible?
post signature

The One Sweep Eyeshadow: L'Oreal Infallible in Amber Rush


We all have that eyeshadow that's our go-to when we're in a rush and want a soft wash of colour - for me lately, it's been L'Oreal Infallible Eyeshadow in Amber Rush! The perfect rose gold sheen that can be layered up to give a more intense effect. it's versatile and just beautiful!

The formula of these shadows is really interesting. Like a pressed pigment but when you rub your finger in it, it transforms into this creamy texture - how cool?! There are tons of other shades but this one definitely caught my eye. On my brown eyes, it brings out the warmer, honey tones but when I've seen this one blue or green eyed girls, oh wow, it's a stunner! For that reason, I think this is a super flattering colour on a lot of different people. 

To apply this, I take an eyeshadow brush (the one pictured on the left) and pack on the shadow on the lid. Since this is more of a pigment, you have to be careful with fallout, so pressing this into the lid gives you the best colour payoff. Then, I go in with a fluffy blending brush and blend out the colour into my crease so that there aren't any harsh lines. Although, if you want a really subtle shimmering effect, taking a small amount of Amber Rush on a blending brush and just lightly sweeping it across the lids gives a pretty subdued look. 

Quick question to all of you beauty addicts, is the shade Bronzed Taupe discontinued? I haven't been able to spot it anywhere but I've been dying to get my hands on it. Any luck finding it?
post signature

Foundation Review: Chanel Perfection Lumiere Velvet

Here we are again, it's just me and my love for testing out new foundations! A few weeks ago I walked into a department store to finally swatch Chanel's newest addition to their foundation lineup. Of course I'd done my research and I basically already knew my shade so when it came time for the sales associate to push me into a purchase, there was no way I could resist. It felt like a rite of passage to get my first Chanel item so it came home with me and we've been friends ever since!

The product in question is Chanel Perfection Lumiere Velvet (my shade is B30). I'm sure you've all heard of the ever so popular, similarly packaged Vitalumiere Aqua for ages now, so this release seemed really interesting. It's a water based formula just like VA but the finish is beautifully matte and velvety, hence the name choice. I never jumped the gun with VA but this just seemed too good to be true! Same lightweight feel, light to medium buildable coverage, and it's oil free, which makes it perfect for the summer months. 

What I loved most about this was the feel and the finish! I can honestly say it feels like you're putting on water on your face, there is nothing heavy about it. As you smooth it on, you can start to feel it transform into a sort of powder but the finish is never chalky or dry looking. This isn't the foundation for you if you want a super glowy look to the skin but I think the formula allows the skin to look natural, but just a little less shine-free. This is another one of those "no makeup, makeup" foundations (which apparently are my fave) because it's completely undetectable with a light layer but it's still able to build up coverage where you need it most and not cake up on you. Doesn't that sound like sweet music to your ears?

Application wise, this is definitely one you'll want to smooth on with your fingers. Because of the very watery texture of this, your brushes will likely soak up most of the product! It really just melts into the skin so make sure to pay attention to where you applied it because there have been times where I don't even know where it starts and ends on my face. If you'd like, you can certainly apply it with fingers and then go in with a brush and buff away at any edges! So you've applied it, now the question is, how long does it last? I'd say this has pretty decent staying power for being such a lightweight base but I wouldn't go into it thinking you'll get more than 6-7 hours without it fading a bit. It does do a pretty good job of controlling oils though, so by the end of the day, you still have more of a demo-matte look to the skin. 

Now, the stats. This comes in a 30 mL bottle for $48, which is a little steep but there are others for much more out there on the market! Like I mentioned earlier, it is oil-free but not fragrance free, so you might want to be cautious with that. This foundation has an SPF of 15 so I wouldn't recommend it for flash photography but this isn't a foundation you'd probably choose for a night out. Final thoughts? If you like a lightweight feeling foundation, with decent coverage and staying power, but like a more matte natural look, this is a really great option! Definitely a staple in my foundation drawer for the Spring and Summer!
post signature

Springtime Adventures!

Last Thursday I took a little adventure with one of my dearest friends to take pictures and do a little exploring around the city! We really had no set plan, we just walked around to see if anything inspired us. At the end of the day, we walked for ages, my feet were killing me, we had breakfast for lunch and we had some awesome girl time! Here are some of the pictures that I snapped along the way. (Warning: if pretty flowers and coffee shops aren't your thing, well then this is awkward.....)

Funny story. So I had the idea to go take pictures in a cafe with one of those fancy lattes. We walked forever trying to find the right place but we ended up in the place we originally planned to go to. While in line to order, I asked the barista "Hi, do you have lattes with latte art in one of those cute bowls?" She tried to conceal her laugh because I actually sounded like such an idiot haha! In the end, the latte art was non existent and they served the latte in what actually seemed like a soup bowl. I really have to get the hang of this fancy coffee deal! 

It was such a fun experience and I think it's something I want to do more often. Call up your friend, go on a spontaneous walking adventure and snap some pictures. You'll have fun, I promise! (And if you get a fancy latte, I hope you can order with a bit more composure ;)


(Obviously staying serious is not one of my strong suits!)


Yay for an awesome girls day with plenty of laughs and memories to last us a long while! 

post signature

Faith Friday: Moments of Clarity...


Yesterday, one of my dearest friends wrote a beautiful blog post about a season of life that we are stepping into and so I thought today I'd feed off of that energy and write about clarity! Have you ever had a moment in your life where things were just unclear? You can't see past your current situation because it feels like you've hit the end of the way - where are you supposed to go? There have been quite a few of those moments in my life but it's so great how God has transformed those situations for the better and now I'm seeing the benefit of having chosen to just keep moving with God. I may have felt like I was walking blindly, but recently He's been giving me some pretty clear sight.

I'm going to touch on a situation that most girls face. The dreaded breakup. No matter what kind of relationship it was, how long it lasted, who ended it, they're just tough. For girls especially, that feeling of "Is there anyone better?" always starts to set in but let me assure you, if you hold onto God He'll show you what else is out there that is much better suited for you. About 3 years ago I went through one of those seasons. I felt lonely and like there was nowhere to go, I was stuck. It's sad that at that moment I couldn't see past my current situation, in my mind this was the end. But over the past couple of years, God has been making it so clear as to why I went through that. All of the pain and hurt were necessary for me to just break down before God and realize that I needed to change. That struggle helped me depend on God and it completely shifted my views on relationships in general. But I couldn't see that then, all I could see was the pain. I now realize that there was truly beauty in the process and that things are becoming clearer because I've asked for clarity. Don't just rub your eyes a bit and call it quits! Ask Him to clarify what you only know in part. The past few days I've seen that become a reality in my life - when you ask the Lord to open your eyes and give you peace in your heart to see what He needs you to see, things just click!

Stay patient and wait on Him. Ask Him to place you in a state of rest where you can fully and confidently say that He is your everything! Trust me when I say that I've asked for clarity and God has answered those prayers in a matter of a couple of hours. It may be quicker, it may take longer, but the point is that it's in His heart for you to see clearly, to see like He does. Just like Diana wrote in her post, your answer may walk in the room when you least expect it. God is really good at surprising us with blessings that our minds couldn't even come up with if we tried. That's just how good He is. Know that this time of feeling unsure and seeing things as blurry is only temporary. Play your part and let God do the rest. You might get confirmation from Him that you really dodged a bullet, even if it takes you a while to figure that out. It may be that what seems like the end for you right now could be the beginning of something beautiful. Trust Him in the process, you'll see clearly soon enough!

This is my prayer for you, and for me as well:

"I keep asking that the God of our Lord Jesus Christ, the glorious Father, may give you the Spirit of wisdom and revelation, so that you may know him better. I pray that the eyes of your heart may be enlightened in order that you may know the hope to which he has called you, the riches of his glorious inheritance in his holy people" - Ephesians 1:17-18

Hold onto this truth, there is a time for everything!

" He has made everything beautiful in its time. He has also set eternity in the human heart, yet no one can fathom what God has done from beginning to end" - Ecclesiastes 3:11

Remember I told you that God has eternal perspective, well He's places that in our hearts too! Just don't lose sight of the fact that you aren't getting the entire puzzle and that He knows best. His time for everything in your life will come, and may even surprise you, so just wait for that beauty to unravel!

post signature

In Rotation: Spring Makeup Essentials & Acrylic Storage

Once you accumulate enough makeup to support your face for a good 5 years without having to buy anything new, it's time to buckle down and get to organizing because there's no way that much makeup can fit into a small cosmetics bag. If you've seen makeup organization tips from lots of beauty bloggers and YouTubers, you'll probably notice that Muji storage usually comes up! You know, the acrylic cases stacked up a mile high on top of each other? Well, I'm still on the hunt for a full set of drawers but I thought it would be good to get an acrylic mini case that would hold my daily essentials and I could access easily. So last night I went to Home Sense and found a gem for $12 - not Muji, but it's super sturdy and well made. Its perfect for holding my must have, can't live without products each season and allows me to rotate them as desired. 

So here's a look at what's in rotation for Spring!


Foundations of choice: Chanel Perfection Lumiere Velvet in B30 & Illamasqua Skin Base in 8.5

I have a few there foundations but these are my newest acquisitions so I favour them over the rest! I've been loving the Chanel for lazy days because it feels so light but controls the oils, and the Illamasqua offering if perfect for when I want a more flawless base! 

Feelin' Cheeky: Illamasqua Blush in Tremble, Tarte Amazonian Clay Blush in Tipsy, NARS Laguna Bronzer

I literally can't put these two down! You know me, when something is peachy pink, I can't resist! It's like they have a special pull that grabs a hold of me haha! Thankfully, they are different enough that I could justify having them both. These are the perfect Spring shades. When I'm feeling a little pale or my foundation is starting to get a little light, NARS Laguna is a must have! A generous sweep of this on the face gives a super healthy, pretty glow to the complexion.

Holy Grail Staples: Benefit The POREfessional, Clarins Instant Light Natural Lip Perfector in 05, NARS Radiant Creamy Concealer in Custard, Hourglass Arch Sculpting Pencil in Dark Brunette, L'Oreal Telescopic Carbon Black

These products are things I will probably always have on hand! Apart from the Benefit primer, I have either purchased each one more than once or just love them above anything else I've tried (primers are just an iffy thing for me, but this one is my current fave!) I'm glad I have these on hand now because they really are all I grab when getting ready quickly. 

Lip Products Galore: MAC lipsticks in Creme d'Nude, Peach Blossom and Morange, Topshop in Ooh La La, YSL Rouge Volupte Shine in 15, L'Oreal Extraordinaire in Rose Symphony, NYX Butter Gloss in Maple Blondie and Apple Strudel, Covergirl Lipstick in 305 Hot, Maybelline Vivid in Vivid Rose, Maybelline Color Elixir in Rose Redefined, Revlon Matte Balm in Unapologetic

You already know it, I hoard lipsticks and lip glosses. Yup, guilty as charged. I have a lot of pinks and corals and some brighter shades mixed in for when I want a pop of colour, which is apparently very often lately! Can I call these all my fave?

What are your current Spring staples? Do you have acrylic storage for your daily essentials that you can't live without?
post signature

3 Lipglosses To Add To Your Drawer...

I'm not the biggest advocate of lipgloss, mostly because I always find them sticky, but as you can probably recall from many of my past posts, the Clarins Instant Light Natural Lip Perfectors are my absolute addiction. That being said, the past few months I've been venturing into the world of gloss more and have found 3 formulations that are actually pretty great! Wanna see my picks?

1. Maybelline Color Elixirs
These made quite the impact when people started talking about them, and I of course, fell into the hype but I think these are a good gloss! Essie Button loves them so you know you have to try it, right? I went a little crazy when there was a sale so I have a total of four (Rose Redefined, Petal Plush, Mandarin Rapture and Breathtaking Apricot). These aren't my favourite gloss to put on just on their own (I find that they sit kinda weird on my lips) but I do love them for layering! I think the colour comes out more true when I pat a small layer of nude lipstick on and then apply the gloss. Overall, they beat out a lot of the other glosses out there on the market. What are your thoughts on these?

2. L'Oreal Extraordinaire by Colour Riche
I absolutely love this gloss. I feel like I should've definitely bought more of these than the Maybelline Elixirs. The new technology that incorporates micro-oils into the formula makes for a super smooth gloss that glides on with ease and is completely non sticky! The colour I have is in Rose Symphony and I think it's the perfect shade for a more subtle take on a bright pink lip for Spring/Summer. It has nice opacity and amazing shine but without that gloopy feel. These are definitely winners! 

3. NYX Butter Glosses
Last, but actually my favourite, are these glosses by NYX that I finally managed to get my hands on! (Backstory: After a questionable job interview experience, buying these lip glosses just seemed right..). I have to say in terms of texture and feel, these are the most similar to my beloved Clarins glosses. In my stash I added the shades Maple Blondie and Apple Strudel, which are very "me" hues! They're creamy and absolutely gorgeous, they aren't sticky and the shades are really beautiful. These are completely worth giving a try and they have my seal of approval. Do you own any shades you think I'd like?

So, what's your take on lip glosses? Love 'em, hate 'em? If you have any formulations you just love, please share them in the comments. I'm always looking to go out and swatch everything I can find ;)

post signature

Illamasqua Master Class + OOTD

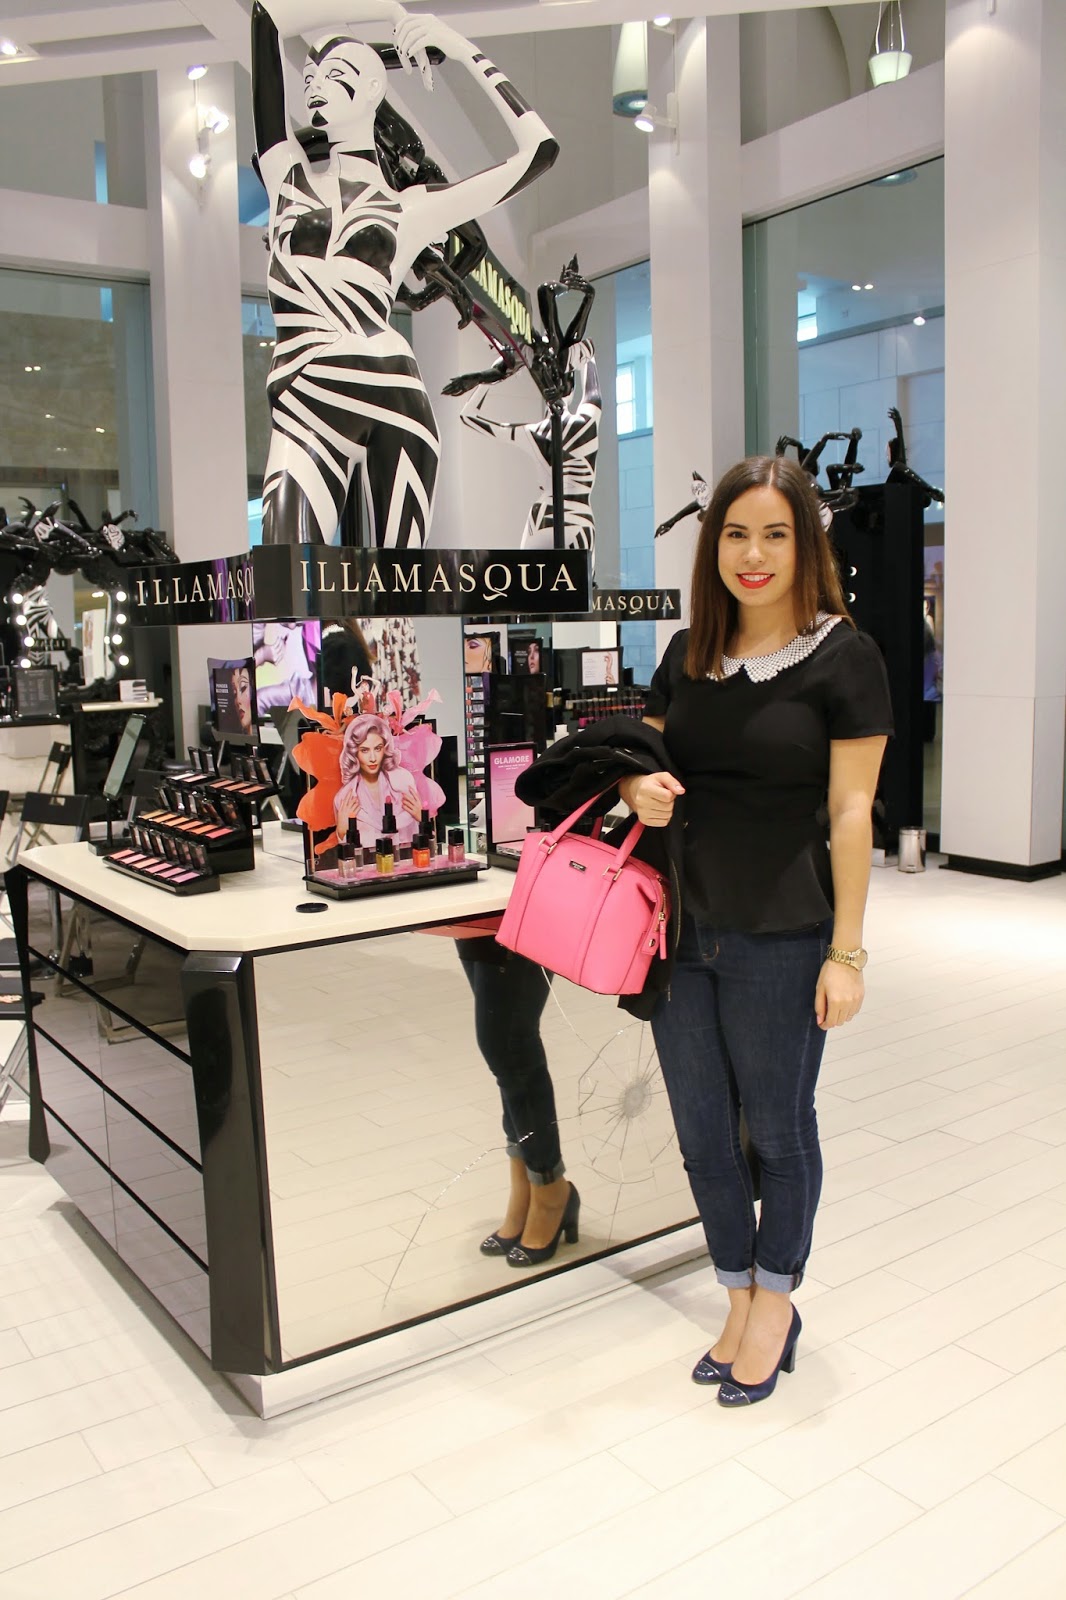
I'm so excited to share all of the tips and tricks I learned last week at an Illamasqua Master Class I went to with one of my best friends. At the first session, it was just my friend and I so it was great to have one-on-one time with a professional who had amazing tips. Thanks so much to Hannah and Julienne and her sister for being so sweet! (Warning: this is another one of those picture heavy posts but I hope you enjoy!)

Before the actual tutorial started, I took a look around the counter and of course, everything was catching my eye. Illamasqua is a relatively new brand but it really has taken the world by storm. It got me so excited to finally see things in person. The brand is focused on colour and everything is super fun and bright. That being said, I think there is a lot in their offering that you can use if you want to take a more natural approach, but the option to play around is there and I love it! The blush and nail polishes are amazing and if money wasn't an option, one of each wouldn't be such a bad idea!

Here's what I wore. This black peplum top is from Forever 21 last Summer and the jeans are Old Navy Rockstars. Of course I wore my favourite navy Etta pumps from J.Crew and then I carried my Kate Spade bag for a pop of colour. When it comes to clothes I definitely need to start wearing more colour because my closet looks like an eternal rainbow of shades of black, white and grey!

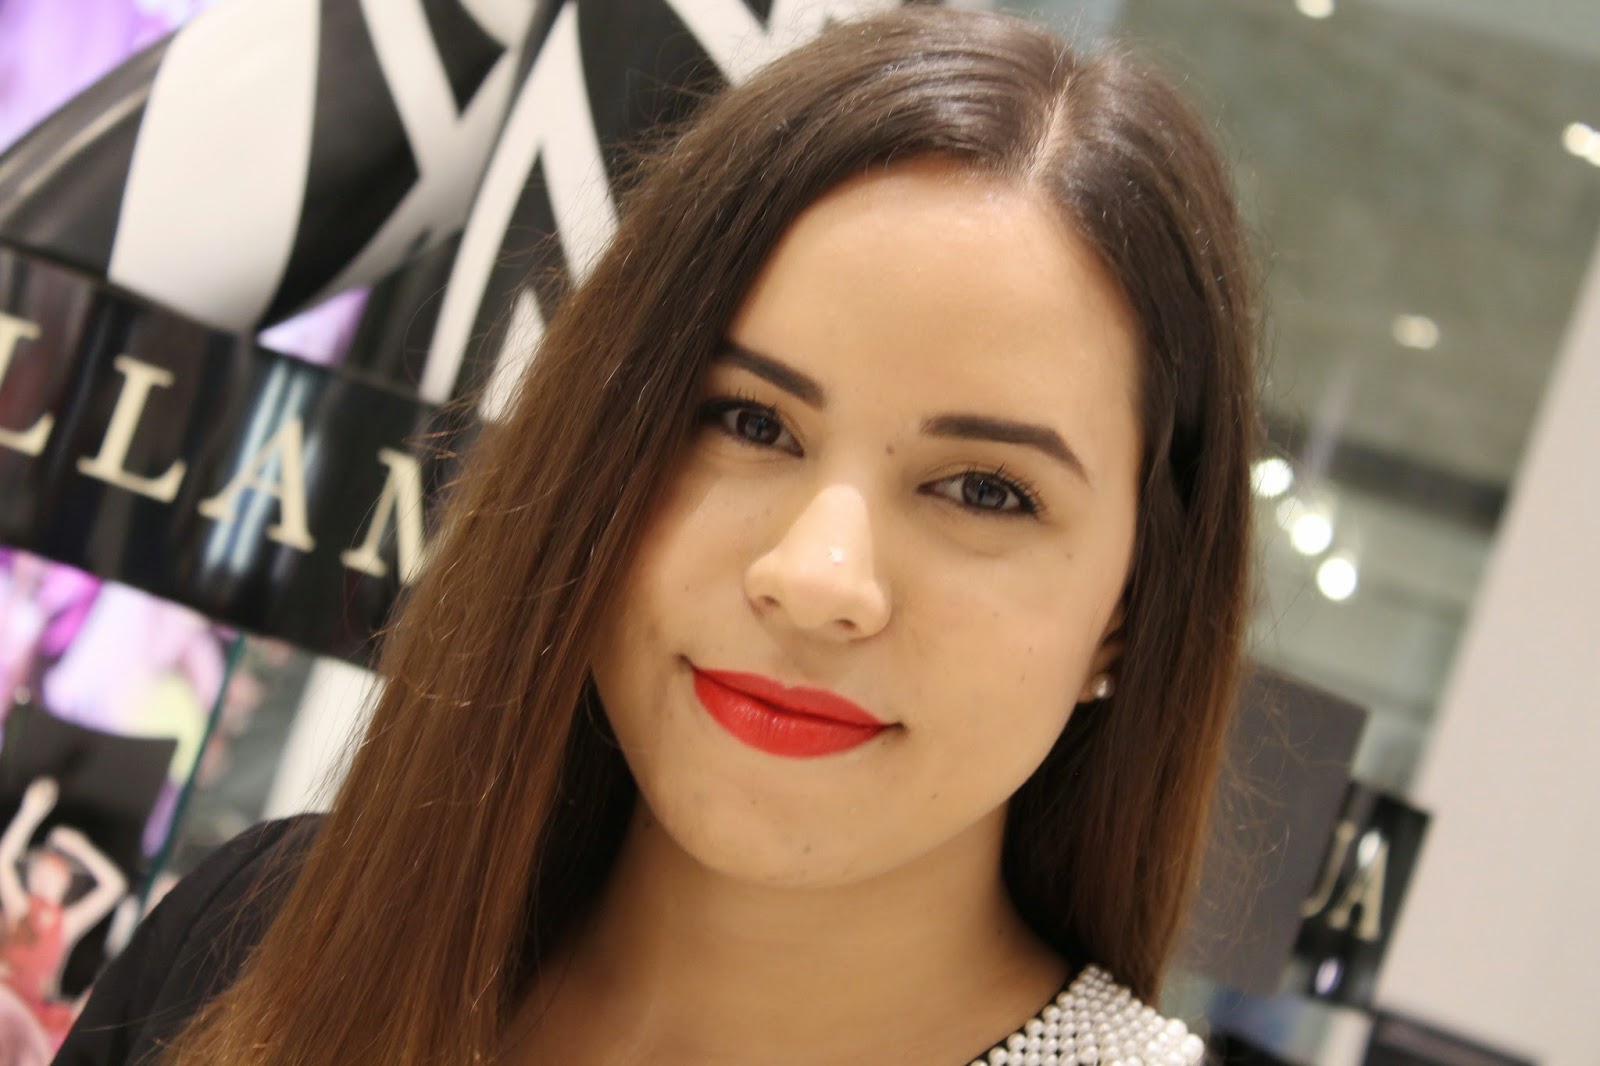
Here's a quick closeup of my makeup! The face is very similar to my day to night post with the exception of Revlon Haute Pink blush instead and CoverGirl Lip Perfection Lipstick in Hot as the statement lip. Word to the wise, this stuff really sticks around so be ready to scrub your lips with a cotton pad and makeup remover when you're taking your makeup off. This is Taylor Swift's favourite red lipstick so of course I needed to have it. 

Let me give you a run down of what look Hannah created. The makeup was more for a corporate setting, the kind of thing you'd wear to work, but with a fun winged liner. You could definitely make the wing less severe if you'd like! She created matte, perfected skin with nude lips and a subtle contour and highlight. I wrote like 4 pages of notes so there's a lot to fill you in on.... here goes nothin'!

Hannah started by prepping the skin with the new Matte Veil and applied it to the face with a foundation brush. This stuff is literally so cool! The feeling is like water but once you blend it in and let it set, your skin is perfectly matte and shine-free. This is one product I'll definitely be going back for! She then created flawless skin with the Skin Base Foundation in shade 8. This foundation gives a natural finish while still controlling oil. It's a 3-in-1 product; it has a built in primer, can act as concealer and provides a medium buildable coverage! She actually applied the foundation with the blush brush because it's soft and was easy to use when buffing it in to the areas that needed coverage. She didn't put the foundation all over, instead she used a small amount and buffed it in to areas of redness. It looked incredibly natural! To conceal, Hannah used a peachy toned concealer, the Skin Base Lift in Light 2, with a blending brush and went under the eyes to counteract any darkness. That blending brush really came into good use for a lot of different areas of the face and I think it would be the one both Hannah and I would strongly recommend. (Again, another thing to add to my list!) 

Next step was contour and highlight to finish off the base. Hannah used something new that Ilasmasqua came out with which are the Skin Base Mixers. These are four colour corrective, very pigmented creams that you can mix with your Skin Base foundation to meet your needs. There are four shades, but the two that were used were White and Chestnut. Everyone has a specific shade of the Mixer and ratio of the mixer and foundation that best suits them, so definitely talk to an Illamasqua Makeup Artist if you have any questions. In this case, Hannah mixed four small drops of Skin Base foundation with one small dot of White. When mixed, she applied the highlighter shade to the tops of the cheeks, middle of the nose, the cupids bow, chin and forehead. She then took the blush brush and blended it into the skin for a beautiful illuminated look. The best part about using these Mixers is that you get a shade that doesn't deviate from the natural undertones of your skin colour!

To contour, she used the same ratio but mixed the Skin Base foundation with the Mixer in Chestnut. She applied the deeper shade to the jawline, cheekbones sides of the nose, and the top of the forehead and temples with the blending brush (see how useful it is?). This time she blending that out with the contour brush. An alternative to this would be the Cream Pigment in Hollow, or if you prefer a powder, you can use the Sculpting Powder Duo which I wrote an ode to last week! Quick tip: for the nose contour, she used the smoothing brush and applied the contour shade down the sides of the nose. To blend it in she brought the colour down from the sides to create a natural looking shadow. 

To finish off the skin, Hannah used the Pressed Powder on a big powder brush and rolled it over the face. This is a great tip so that you aren't wasting product or applying it in swirling motions and therefore moving all the products you put on before! This powder is awesome because it's translucent and you can use it on any skin tone, although it would be advised that darker skinned girls use it sparingly to avoid any ashy tones coming through. For extra brightness under the eye, she mixed Skin Base Lift in White Light and Light 2. This made a huge difference! 

Look at the difference! 
Next step, eyebrows! This part actually has me gasping because Hannah was able to create amazing, full eyebrows that still looked natural! Since the model was a blonde, brows were filled in with the Eyebrow Cake in Motto, which was the perfect shade for her. With the angled brush she started on the bottom of the brow under the arch and started to create a smooth line to define the shape she wanted to create. She then did the same thing on the top, making sure the emphasis was on the arch. A great tip is to mix this brow powder with the Sealing Gel for water resistant brows, but keep in mind that this will darken the shade of the brow colour slightly, so pick your shade accordingly! (Another tip: Mix Sealing Gel with foundation for even more waterproof makeup...) If you struggle with your brows then remember this simple rule, always have the darkest point be at the arch and the lightest near the front. This will give you the most natural looking, gradient effect. For really perfect brows, use a concealer brush in a concealer a shade lighter than your skin tone and go under the brows to outline them and make the line super crisp. This is a great thing to do if you want to hide loose hairs, and who wouldn't want that after not plucking for a few days ;)

Now onto eyes. Hannah used the concealer as an eyeshadow base but she told us that if you use White Light as an eyeshadow base, it's amazing for getting eyeshadows to look 20x more bright and pigmented (see above). The eyes consisted of the shadow in Stealth all over the lid and Heroine in the outer corner. The shade Heroine can be used as a contour, blending for smokey eye looks or a transition colour! To soften the colours and help get rid of any harsh lines, the trusty blending brush saves the day. I told you that brush was the most useful! You can contour in the eye socket with the darker shade all the way into the inner portion of the crease to get that 50s Marilyn Monroe look! Since this was primarily a matte look, and the most emphasis was put on the skin, a shimmering loose pigment in Furore (this is actually the pigment version of Lumos, which is in the Sculpting Duo palette) was only used to highlight the brow bone and the tear duct. This pigment is seriously beautiful and looks incredible if you use it wet and mix it with sealing gel. 

For the winged liner Hannah used the Precision Gel Liner on an angled brush and started by making the desired angle first on the outer corner. I'm horrible at winged liner so her tip was to do it step by step. It's much easier to do each step on both eyes and then move on, instead of doing the line on one eye and trying to match it later. That's just a recipe for disaster! After making the outer angle the way you want it to look on both eyes, then go in and make a line across your lash line. Once you get to the end of your lash line, you connect the liner all the way to the line you previously made. She finished off the eyes with a couple of swipes of Masquara in Raven. To clean up the wing, you can go back with the lighter concealer you used to define your brow shape and make your line extra precise. 

Last few steps, are you sticking with me? Hannah took Fantasy lip pencil to define the lips. She used the tip of the pencil to outline the lips and then used the side of it to shade in the entire lip. Next, she applied Test lipstick, which is actually being discontinued because the lab lost the pigment used to create the shade (haha), so get this now at your counters if you want it! Their lipsticks are matte and water resistant but for a glossy effect she used Enchant gloss over the lips and finished off the entire look with a bit of Naked Rose blush

The finished look!
After the master class was over, we took a look around and decided on what we were going to be taking home with us. I definitely grabbed the Skin Base foundation (I was matched with shade 8.5) and the Mixers in White and Chestnut. No one needs more foundation but apparently it's one thing I'm always down to try! I knew I'd also have to leave with a blush because that's my latest obsession and I chose the shade Tremble which is the most beautiful peachy pink (anyone surprised by that choice? haha). I loved learning all of these new techniques and seeing the Illamasqua products in action! Don't be surprised when the products I picked up pop up in upcoming posts soon. I hope you learned something and that you may have found some products that catch your eye. 

A really huge thank you to the girls at Illamasqua for being super awesome and putting up with our constant picture taking! I had an amazing time! 

post signature

Motivation Monday

via @aubreykinch

Faith Friday for last week turned into Motivation Monday for this week! I wanted to do something a little different this week and just encourage and motivate. It's great to learn more about what we need to work on, but sometimes all we need is a gentle (or not so gentle) push to continue on the path we're on. It can be tough to move forward when you feel like no one is on the side lines cheering you on, but although I probably don't know you, I pray that God will strengthen you and that you'll be motivated to be the best you can be for Him! 

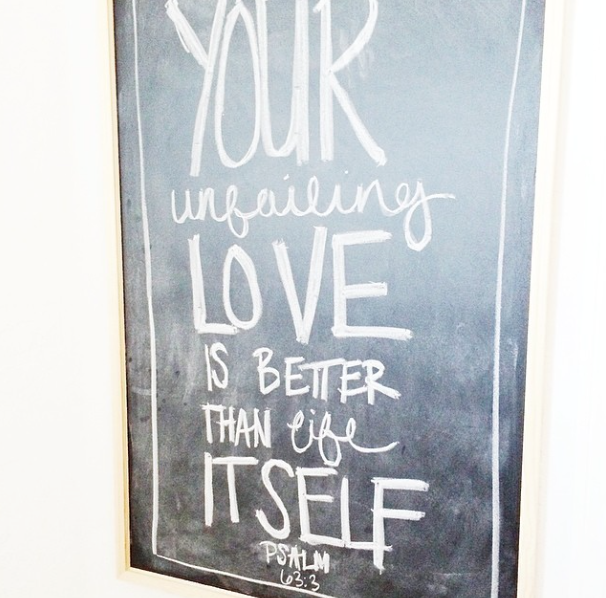
Psalm 63 was a chapter that really helped me last week. it's such a beautiful declaration of trust in God and just an outpour of love for Him because He really is the best thing, ever. I motivate you to, like David, seek and thirst for the Lord. To know that it's not enough to say that you believe in Him, when you don't put the time in to get to know him better. This goes back to my last Faith Friday post! 

Declare this today:

"Because your love is better than life, my lips will glorify you. I will praise you as long as I live, and in your name I will lift up my hands" (3-4)

"Because you are my help, I sing in the shadow of your wings. I cling to you; your right hand upholds me." (7-8)

Know that He is your help and that you can find comfort in His arms. Just think about that verse, 'Your love is better than life" - life is usually what we treasure the most, yet He far surpasses it because He is the life. We don't have life unless it's through Him!!! Push forward and stop looking to your past. I struggle with this constantly and this week during Youth Group, we talked about that. It hit me like a tonne of bricks. I am not defined by who I was. God sees you where you are now and He longs for you to reach your fullest potential. He sees that so clearly but we often struggle because our vision is cloudy. So pray for clarity! Pray that you move beyond this line of division between who you were and who you were made to be. Step over that boundary into what God has for you. Run as fast as you can towards it. Soon enough, in His timing, you'll understand that there was a bigger picture. 

I encourage you and pray that today you will feel a sense of peace in your heart. Have a great week, and for my fellow Canadians, hope you enjoy Victoria Day!

post signature

Instant Cheekbones: Illamasqua Sculpting Powder Duo

There are certain trends or crazes that really seem to explode in the beauty community. One of these is the extremely highlighted/contoured look made famous by Kim K. You know, the one where you look like you've got war paint on. I have nothing against this look for a special occasion but for the everyday girl who just wants to emphasize her cheekbones a bit, it can get a bit excessive! I've been on the hunt for a contour powder that wouldn't leave me looking muddy because I'd used a matte bronzer for this purpose previously and it could look somewhat orange if I wasn't careful.

Well, I found the one! I stumbled across an Illamasqua counter, which was super exciting because I'd never seen their products in person, and of course the makeup artist tried the Sculpting Powder Duo on me and I had to go back and grab it! This gorgeous compact comes with a shimmering, champagne highlighter in Lumos, and a neutral matte contour powder in Helipolis. First off, I love that they come together in one compact. Since this isn't a step I was completely comfortable with, it's nice to know I don't have to buy two separate products to get my desired look. Plus, with a $36 price tag, there's not much to cry over! 

What really sold me was how natural of a shadow this contour shade created. It was nothing overly severe or muddy looking, because the colour is perfectly ashy. I take this on my Real Techniques Contour Brush and suck in my cheeks, then I apply it from the hair line going towards the corner of my mouth. I don't extend it too far in but mostly concentrate it on the outer portion of my cheekbones. Definitely love how natural the shadow looks! One downside to this might be that the shade is too light for people a few shades darker than me, but a good alternative I've seen people loving is the Kevyn Aucoin Sculpting Powder in Medium! I might have to give that one a whirl once I get darker, but I'll keep you updated.

I'm not a huge highlighter girl so I was thrilled to finally have a powder highlighter in my collection. Whenever I'm in the mood to do have a dewy, illuminated look, I'd grab the mini sample of Benefit's Watts Up! I got for my birthday last year at Sephora but this is perfect because it's a powder formula. Since my skin is on the oiler side, I find this powder gives my skin a really pretty glow on the tops of my cheekbones without going overboard. It looks really shimmery in the pan but on the skin it leaves more of a sheen. I think this shade will work on a lot of people because it's not too pink, and I think that's something that often makes highlighting powders look really fake when applied. 


I'm seriously loving this little palette and I see myself making the effort to contour and highlight a lot more now that I have this beaut! The shades are pigmented so you don't need a ton on your brush and it is super convenient to have both steps together. Definitely a good introduction to Illamasqua - which reminds me - I'm going to a master class held by Illamasqua this week and I might have a few more goodies from the brand to share, so keep your eyes out for that!

Any Illamasqua products you'd recommend?
post signature
Blog Content. © Glorious Peonies | A Lifestyle And Beauty Blog . Blog Template All rights reserved. © Maira Gall.