Showing posts with label OPI. Show all posts

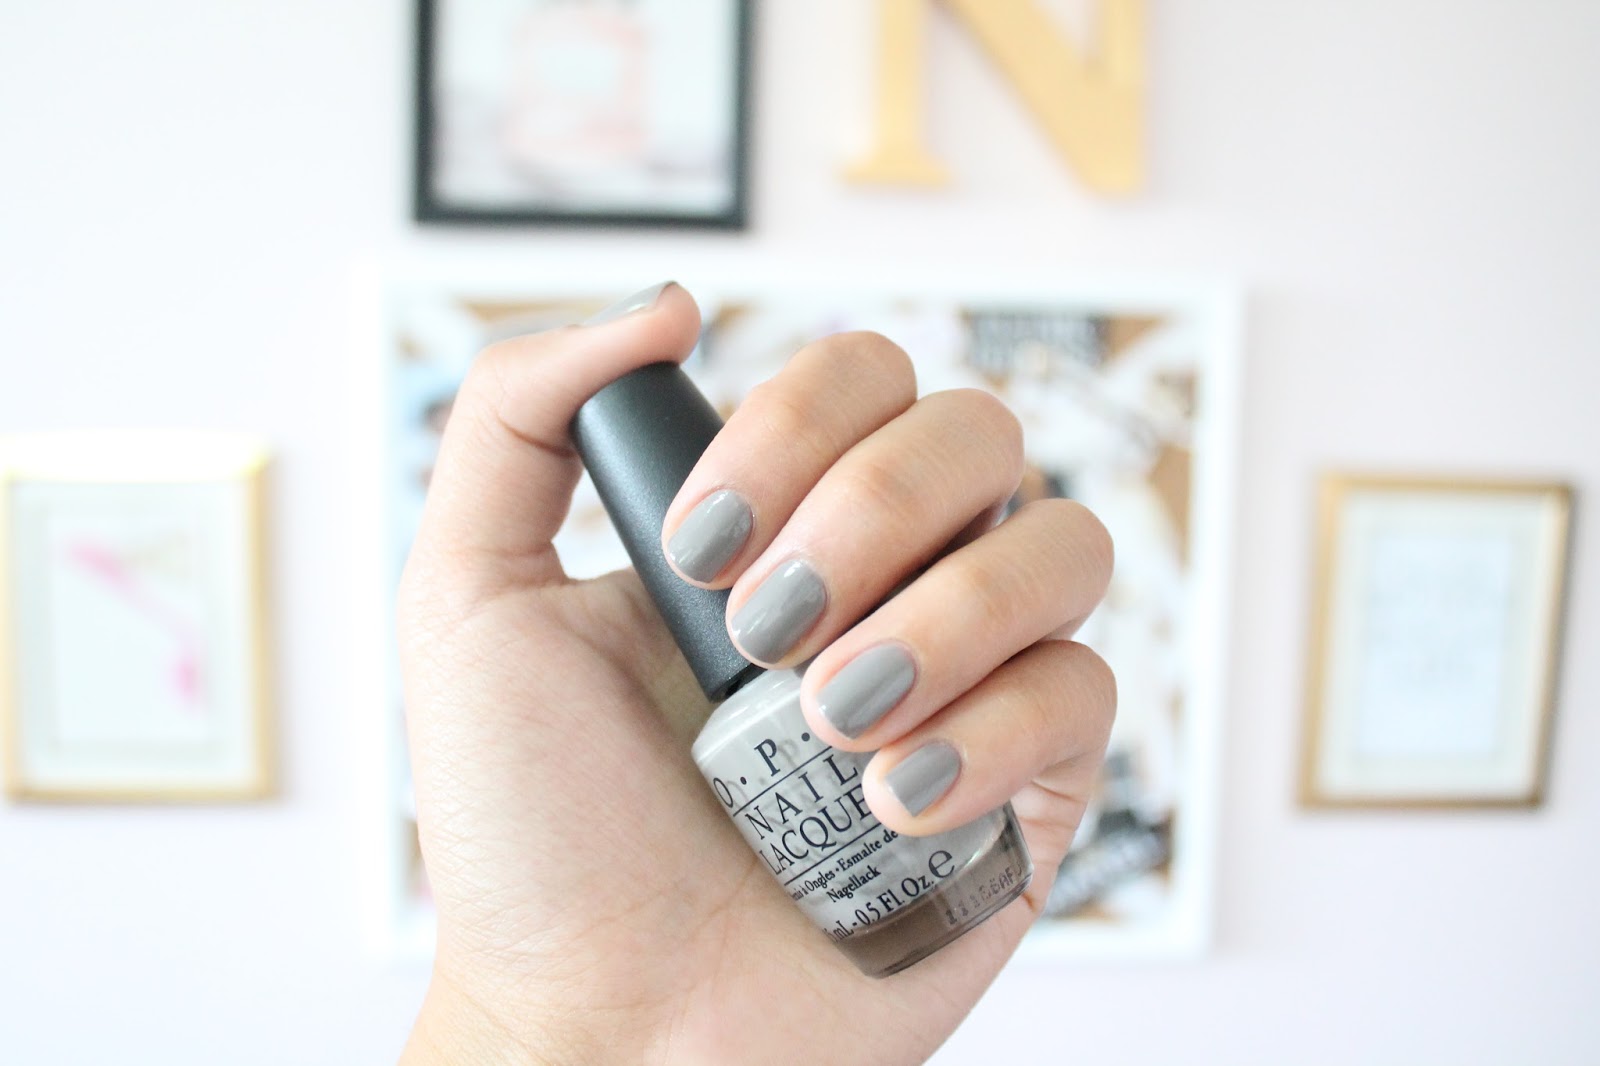
NOTD: OPI French Quarter For Your Thoughts


It may still be technically summer, but the weather around these parts has been stating otherwise. It's the middle of August and temperatures seem to be dropping at alarmingly fast rates. I love the fall, don't get me wrong, but there's something unsettling about having bought a million rompers and it being too cold to even wear them. 

As indicated by the weather chance, my nail polish tastes are starting to make the summer to fall shift and every year for the past three years I always turn to OPI French Quarter For Your Thoughts! It's a mid tone grey shade that is beautifully creamy and goes on opaque in two coats. It's perfect if you love neutrals but you want to make the change into the more cool side of the colour spectrum. It leaves your hands looking polished and clean, doesn't clash with your outfits, and is ideal as a transitional colour. 

Any polishes that you love when moving from summer to fall? I honestly can't believe Autumn is almost here, I have three weeks before I go back to uni and at the end of September I will have had this little blog for a whole year! *gasp* Time flies by, huh?

post signature

NOTD: OPI Tickle My France-y


As much as I love fun, bright nails in the summer, sometimes it's nice to tone it down and choose a neutral polish that'll pair well with any crazy combination of colours you might be wearing outfit-wise. Lately, my favourite pick for that has been OPI Tickle My France-y. 

I've been obsessed with Essie polishes for the past while but I thought I'd go back to my tried and true OPI polishes for this gorgeous shade! I remember seeing this when the France collection came out years ago and never picking it up. Although it is a late addition to my nail polish collection, it's quickly becoming one of my favourite slap on and go polishes (much like Essie Mademoiselle has been for the past year!). 

The formula of this is creamy and applies like a dream. Two coats is all you really need! This is very much a colour that gives your hands that sophisticated look - are you following along? I know it may seem strange but it just looks really polished while adding a bit of colour, unlike very pale pinks do. I think I'll love this even more when Fall comes in! In terms of dupes, it's very similar to Essie Ladylike although Ladylike is definitely a bit more purple. So if you have one, you really don't need the other! 

Any OPI polishes you're loving? I just picked up The Thrill of Brazil and it might be my new favourite red!
post signature

The Essentials For a Pro At-Home Manicure


I could easily count the amount of times I've gotten a professional manicure at a nail salon. I've honestly always enjoyed doing it myself - it's kinda therapeutic! A lot of my friends compliment me on how I paint my nails and after practicing for so many years I think I have a system that works really well. The picture above contains all of my essentials but you might notice that I haven't included my nail polish remover, nail file, and cotton buds. Honestly, I haven't found any products in these categories that I like enough to say they're what I use every time since I alternate what I'm using once things run out. For nail polish remover I usually just buy whatever is on sale at Shopper's Drug Mart, although I really want to try the Zoya remover with a pump! It looks so convenient. Same goes for my nail file and cotton buds. I'm not particular with either of these although I can usually tell what I like more than another option. I would love to switch to a crystal nail file just to prevent any nail splitting! 

Alright onto the products I use each time I give myself a manicure:

Cleaning & Maintenance //
After polish removal and shaping, I like to run a nail tool that has a pointer tip under my nails to get rid of any "nail dust" (this probably has a more technical name) and dirt that may be lingering. Especially if you choose a sheer polish, you don't want to be seeing any dirt underneath your nails. Not a good look ladies! The tool I use (the black one) has been in my collection for wayyyyy too long so I have no clue where you can find it but here's an inexpensive option that you can find at Sally's Beauty Supply. 

Push Back Those Cuticles! //
A good manicure is only as good as your cuticles look. Nothing is worse than having painted your nails and then having a dry cuticle area and little pieces of skin hanging around. I start by applying the Sally Hansen Instant Cuticle Remover and then pushing back my cuticle with the tool mentioned above. If this wasn't enough to get all of my cuticle out of the way then I will go in with my LOGO by Cricket cuticle nippers (reasonable price if you don't want to go for the Tweezerman version) and remove anything that could get in the way of my polish. Make sure to really push your cuticles back before starting to apply nail polish because it elongates your nail bed and it's healthier for your cuticles compared to cutting them away completely with the nippers. 

Putting On The Foundation //
Just as foundation is crucial to creating a perfect base for the rest of your makeup, a good layer of base coat is essential for the perfect at-home manicure. Some people don't bother with this step but it can be your strengthening and growth treatment, yellow nail preventer and manicure endurer all in one. I've been using the Sally Hansen Complete Care base coat because it's multipurpose and does everything I would need in one simple step. 

Polish It Up //
The part you've all been waiting for... putting on a fresh coat of colour. Like I mentioned in my recent post about my Essie obsession, the brushes are my favourite for getting a precise curve around my cuticles but this colour pictured above by OPI in Miami Beet is the perfect transitional colour from winter to summer - and it would look great as a pedicure colour. I like to apply the polish a little bit separated from the cuticles because it makes the finished product look a lot more professional! The first coat is crucial for creating a good shape and then the second coat will fall right inside that outline you created and cover up any streaks. I'll hopefully film a video of my manicure routine sometime soon! (yay for potential YouTube videos?!)

Glossy Finish //
After so much hard work - which only takes under 10 minutes if you get the routine down - you need to lock all of your steps into place and give your tips a mirror shine effect. A few years back I used the Seche Vite topcoat but after hearing about all of the health warnings and I decided to choose something that didn't smell like death in a bottle and forced me to open all of the windows in my house. I'm already on my second bottle of Sally Hansen's Insta-Dri which is almost as fast drying as Seche Vite (I don't know if anything else beats it in that respect) and gives you a high shine finish. I also suggest Sally Hansen Mega Shine because it basically does that same thing and I think is a little shinier. Perhaps after this bottle runs out I'll switch it up a bit. 

Damage Control //
So, you've finished your manicure but then you notice you've got some polish around your cuticle or all over your finger... what to do? Take an orange wood stick like these ones by TRIM (I found the 12 pack I have at my local Walmart) and wrap a little bit of cotton wool over the pointy tip. Place the tip in a little nail polish remover and in a few swipes it'll look like you there were never mistakes there!

Moisturize //
Remember to always take care of your hands after you give yourself a manicure and apply hand cream at least once a day to make your hands, cuticles, and nails looking like new. I love L'Occitance Shea Butter Mini Hand Cream, especially because it's great to carry around with you - don't bring a huge 30 mL tube with you in your purse unless you want to hand out hand cream to everyone you see. For a more intense cuticle treatment apply a drop of Josie Maran Argan Oil Light on one one finger and just spread it to the rest of them - a tiny amount is all you need. I have the mini travel size version of this too!

The length of this post may be a little frightening but having the right tools can make a world of a difference and with a few times of doing this routine, you'll have a 10 minute, pro at-home manicure every time!
post signature

Perfectly Polished: Clean, Fresh Nails

Nail polish. Just hearing those two words get me giddy and reaching for my nail polish remover waiting to see what hue will grace my fingertips next. As the weather starts cooling down (... freezing up is more like it), I tend to reach for darker, vampy shades. That being said, this year soft pinks and nudes are tickling my fancy - that made me giggle just typing it - and I'm not complaining. No matter what time of year it is, there is nothing more satisfying than looking down at your hands and seeing freshly manicured nails that look clean and very Kate Middleton-esque. *sigh* She's so beautiful. Ok, back to nail polish, I tend to get side tracked whenever I think about how gorgeous and ladylike she is. Don't judge!

If you feel the same way or don't but want to see what the fuss is all about, here are some shades that are sure to make you swoon!
Top Row: OPI - (L to R) Bubble Bath // Coney Island Cotton Candy // Samoan Sand
Essie - (L to R) Allure // Fiji // Eternal Optimist
Out of this bunch I'd have to say my faves have to be Bubble Bath and Fiji. In this picture you might think that they're similar but the formulas and opacity are very different. Bubble Bath is definitely sheerer while Fiji is very opaque and gives your nails such a clean, girly look - It's the polish Emily Maynard always wears. And how pretty is that neutral ombre look?! I think I may give that a try soon.

Thanks for stopping by x

Glorious Peonies.
Blog Content. © Glorious Peonies | A Lifestyle And Beauty Blog . Blog Template All rights reserved. © Maira Gall.