Travel Diary: Quebec City + Montreal

If you follow me on Instagram you will will have seen that I was in Quebec City this past weekend, and even made a quick pitstop in Montreal. I've been wanting to visit these cities for a while now and I had a ton of fun. It's amazing to see how much culture can change within the same country. A few hours drive (which felt like an eternity) and you were hearing people speak in a completely different language... love it! Here are some pictures from the trip and a few things that happened along the way. 

First off, these will all be pictures taken with my phone's camera because silly old me left the DSLR at home. Yeah, not a fun way to start the trip but I must say it all worked out in the end. I was really disappointed when we were already 45 mins away from home and I realized that I hadn't packed it but it taught me something. As much as you plan in life, things can slip through the cracks and we can't always control everything. So, I could either let it put a damper on the whole trip or embrace it and enjoy the experience. (fyi, I chose the latter!)

Day One: Spent the day in the car on the way to Quebec, reading the August issue of Allure which I loved, and listening to music. Just before evening, we had finally made it, checked into the hotel and started walking around Old Quebec to see the city as the sun was setting. I was completely in love from the first moment. Old European influences, colourful doors, tons of cute little restaurants. As close as you'll get to being in Europe within Canada so it was pretty magical! Once the sun had gone down and everything was lit up, oh boy was it even more beautiful. The Chateau Frontenac looked incredible. 


Chateau Frontenac at night!
Overlooking the St.Lawrence River
Day Two: We went to breakfast at Paillard which is a really cute bakery on St. Jean St and then made the drive to see Montmercy Falls and the Basilica of Sainte-Anne-De-Beaupre which was so beautifully decorated in mosaic tiles. Once we came back, we walked around the Petit Champlain area and saw Place Royale then headed to dinner at Cochon Dingue which had some really yummy Steak Frites, my fave. 


Montmercy Manor!

Gelato is always a good idea ;)
Day Three: We left Quebec City and drove to Montreal for a quick stop to see the Old Port and look over the city atop Mont-Royal. By mid afternoon we were headed home.... which took ages because of traffic! All in all, it was a really fun weekend and I would totally recommend going to Quebec. Now, I have to see Quebec City in the wintertime! 

Loving the cobblestone streets!

Overlooking Montreal on Mont-Royal


Hope you enjoyed those pictures! Anywhere interesting you've travelled to this Summer?

post signature

The Summertime Base: Matte & Long Lasting

There's a lot to love about Summer, but one thing that I could definitely go without is the crazy amount of heat which leads to my face looking like an oil slick. Oh boy, is that annoying. I have combo/oily skin during the colder months, but when Summer hits there is just no shortage of oil production and my makeup slipping and sliding everywhere. Not a good look. So, after a few months of testing out different combinations of foundations and primers, I want to share with you the combo that keeps my skin looking matte for the whole day. (side note: if your skin is super oily all year round, this duo will be perfect no matter what season it is!)

If there's something that I get asked the most beauty-wise it's if using a primer is worth it. I myself was never much a primer lover. I found the added step to be redundant and time consuming but once I found one I loved, there's just no going back. Sure you can skip it if you're in a rush but when the task at hand is to keep your foundation/base products on for as long as possible, it's an incredibly essential step. This summer I've been loving the Smashbox Photo Matte Primer for my t-zone. Just a small amount massaged into the skin gives your skin a super smooth canvas that allows your foundation to glide on evenly. I also find that this primer in particular helps my foundation to not break up as much during the day when the sun starts beaming down. (I can't seem to find a link to this primer anywhere so I'm not sure if it's discontinued... if that's the case then I'd be really sad about that!) Another primer I love is the Benefit POREfessional, not as oil controlling but it makes your skin smooth and helps your foundation last a lot longer! 

Oh, this foundation. I looked at it for years, tested it out and never bought it, but after using it for the last few months, this will definitely be one I use every summer without fail. The Make Up For Ever Mat Velvet + Mattifying Foundation is a medium to full coverage buildable foundation that controls shine and is water resistant and oil free. I would not recommend this for anyone that has dry skin but if you want your foundation to last all day and combat oiliness, this is your guy! A little of this goes a super long way and I find that it looks best when really buffed into the skin. If you don't like anything full coverage then this will not fit the bill for you but I definitely think it feels more lightweight than expected. When I bought this I thought it would be extremely heavy feeling, but in reality, it didn't feel that bad. It won't feel as lightweight as other options but with the amount of coverage this gives, I didn't expect that anyways. I have the shade 35 in this but as I got more tanned, that shade became too light. I may have to go in to pick a shade or two darker! 

Those are my picks for a mattifying, long lasting base duo this Summer. If you have any recommendations for products that fit this category I'd love to know in the comments below! 

post signature

Maybelline The Nudes Palette: Worth The Hype?

Remember that time I did a post saying I wasn't really into the whole eyeshadow thang? Well, times have certainly changed and in the next week or so you're gonna get a few posts coming at you about some recent eyeshadow palette purchases, starting off with this drugstore offering from Maybelline!

When I heard that a drugstore brand was coming out with a full on eyeshadow palette, I had a little freakout sesh. This is the first and only palette of its kind that I've found at the drugstore, since you can usually only find trios and quads. Similar to the concept of the ever so popular Urban Decay Naked palettes, the Maybelline The Nudes palette offers 12 neutral shadows, varying from cool to warm tones and mattes to shimmers for the reasonable price tag of about $15 (probably cheaper if you live in the States!) If that doesn't sound good to you then I don't know what will. Now, let's get into an in depth review of what I truly think about this palette. 

First off, the packaging. For the price tag you really can't expect a very luxe case for these shadows, so the plastic outer shell, while not luxurious, is sleek looking and sturdy enough to protect your shadows from cracking. I do like that it's simple and black and resembles a more expensive option. The biggest gripe I have with the packaging is the lack of a mirror. While I usually use a bathroom mirror or my vanity to get ready, it would be nice to have a mirror inside in case you're travelling or need to touch up your look if you decide to smoke out your shadow for a nighttime appropriate eye. Oh, and I would've appreciated if these shades had their own names because then I wouldn't have as much trouble naming each one - "the third shadow in the bottom row" just doesn't have a nice ring to it!

The eyeshadows themselves are a bit of a hit or miss. They're not all beautifully pigmented and buttery to the touch but some shades do perform better than others. I found that most of the shades on the top row of the palette needed to be packed on heavily to get a decent colour payoff except for the star of the show which is that deep bronze shade (4th on the top). That bronze is the standout of the entire palette and I'd probably buy the palette just for that shade. You can see it in action in my latest video! As for the bottom row, the first shade to the left is basically the powder eyeshadow version of the Maybelline Colour Tattoo in Bad To The Bronze, so layering them gives you much better pigmentation! The light gold is decent but I would've definitely loved to see a more richly pigmented finish like the bronze shade on the top row. The fifth shadow on the bottom row is very disappointing and it barely shows up on the lid, so this one needs some definite work to get it to show up. Lastly, the black in the palette isn't very dark, it resembles more of a deep grey, but I think that might be a good thing if you're a beginner so that you don't get too dark of a look, too quickly. I do like that the palette has a variety of cool and warm shades so that you get a bit more versatility but some of the essential shades to create these looks need a lot of work to get them to standout, which is a major bummer.

I definitely like this palette. I can see myself reaching for it because of certain shades within the palette but I wouldn't be completely content with just this palette in my makeup stash. If you're looking for a drugstore addition to incorporate into your eyeshadow selection, this isn't an awful choice! 

So you're not getting a palette filled with highly pigmented, creamy shadows all-round, but some of the shades do work better than others. If you have other eyeshadow palettes that you just love, this may not wow you, but for the price this is an awesome palette for someone who is starting out with makeup and wants to dip their toes into the eyeshadow waters but doesn't want to spend tons of money. Hopefully more drugstore brands jump on the bandwagon and come out with full-size eyeshadow palettes like these. That would make for an interesting palette battle, huh?

post signature

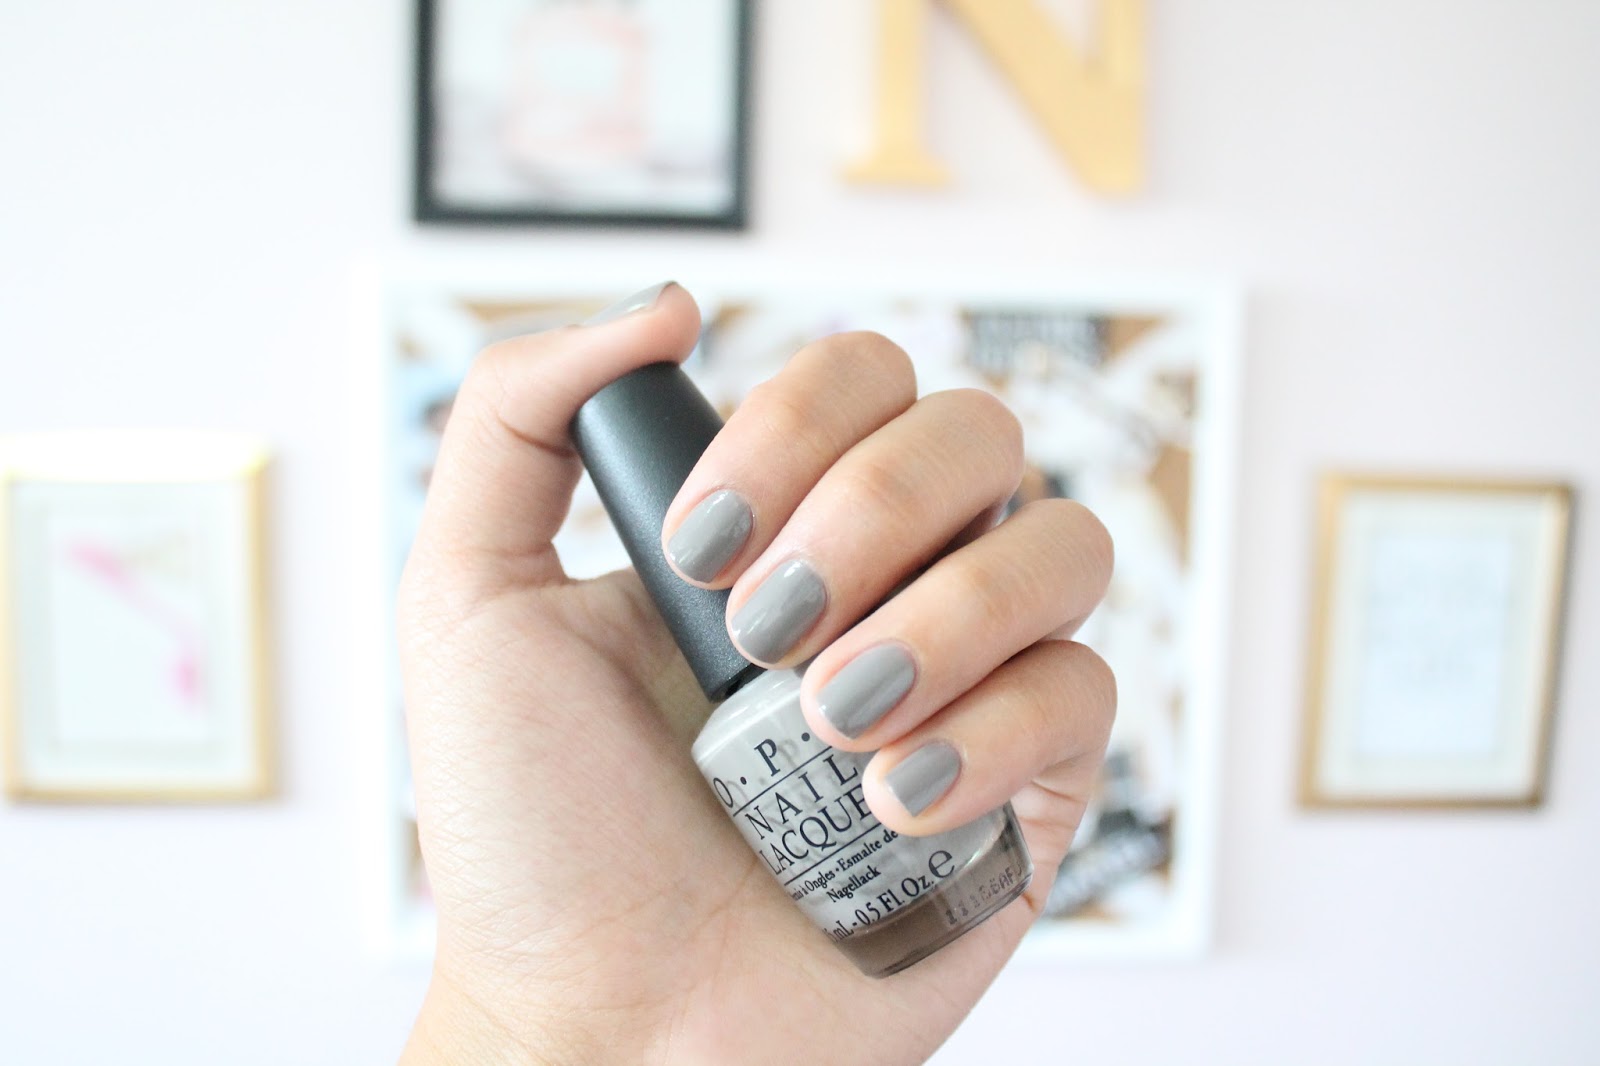
NOTD: OPI French Quarter For Your Thoughts


It may still be technically summer, but the weather around these parts has been stating otherwise. It's the middle of August and temperatures seem to be dropping at alarmingly fast rates. I love the fall, don't get me wrong, but there's something unsettling about having bought a million rompers and it being too cold to even wear them. 

As indicated by the weather chance, my nail polish tastes are starting to make the summer to fall shift and every year for the past three years I always turn to OPI French Quarter For Your Thoughts! It's a mid tone grey shade that is beautifully creamy and goes on opaque in two coats. It's perfect if you love neutrals but you want to make the change into the more cool side of the colour spectrum. It leaves your hands looking polished and clean, doesn't clash with your outfits, and is ideal as a transitional colour. 

Any polishes that you love when moving from summer to fall? I honestly can't believe Autumn is almost here, I have three weeks before I go back to uni and at the end of September I will have had this little blog for a whole year! *gasp* Time flies by, huh?

post signature

The Video: Bronzed Summer Makeup


So, you're probably saying "hey stranger!" It's definitely been way too long since I've posted. But I'm back and ready for some serious business. 

I filmed this video on my go-to summery, bronzed eye and pinky peach lip combo - one of my faves! It was really fun to film a more in depth makeup tutorial and I even threw in some bloopers at the end. Hope you guys enjoy this look and are excited for new things coming your way in the coming weeks! 

post signature

Two Makeup Tools Everyone Needs

That's quite the title for a beauty post, huh? After a few weeks of playing around with these two beauty tools, I can honestly say that I would never go back to not having them around. Why might you ask? Because they make your life so much easier! 

Let's start off with that little egg shaped, pink sponge. You've probably seen it before and thought that it's so overpriced (which it kinda is but that's besides the point) but the BeautyBlender is essential for making your base look like skin. I have no idea what it is about it but once dampened, it's able to seamlessly spread out foundation and concealer and press it into the skin so as to not have a masking effect. You avoid any harsh streaks that could come out of using a generic foundation brush and you get a natural look even from higher coverage foundations! Magical I tell you. My biggest tips would be to always use this sponge after it has been soaked in water and rung out - it will prevent the sponge from sucking up all of your foundation. On that same note, I think you get the best results when using a foundation that has a bit more of a thick consistency. Something like the Chanel Perfection Lumiere Velvet is so liquidy that it'll be soaked into the sponge. Just like any of your brushes, always wash this after you use it. With my other brushes I tend to wash them every week, but I wash my BeautyBlender after each use because I want to prevent it from getting stained and from sitting around collecting bacteria. Cleaning it is super simple - take a small blob of cleaner onto the sponge and gently massage it in. Then all you need to do is rinse it out well with water until the water is clear and let it dry. All in all, such a good makeup tool!

I feel like I'm going to talk about the MAC 217 for the rest of my life and make everyone I know get it. This brush is the most useful one I have in terms of eye brushes because it does it all - buffs shadows onto the lid, it's perfect for adding depth into the crease and it blends out all of your shadows to prevent any rough edges. It's amazing! This is my first MAC brush and I must say, you get what you pay for. Sure, it's more expensive than ones you can get at the drugstore, but the quality is impeccable. You could easily have two or three of these in your collection and it wouldn't be a waste because they're so multipurpose and will last you ages. If I had to recommend one eyeshadow brush to you, hands down it would be the MAC 217. 

While getting makeup is exciting, you can't forget about the tools you use to apply it with and these two are my absolute loves! If you have them, let me know your opinions and send some more recommendations my way of tools you just can't live without. 

post signature

The Video: Beauty Haul ft. Sephora, MAC, Drugstore


Guess what? A new video is up on my YouTube channel and it's all about my most recent beauty purchases! For the past two months I've been crossing off a few things on my beauty wish list and I thought it was finally time to share them all with you. Some of these things were featured in my recent birthday beauty haul post and some others weren't, so check it out and let me know what you think. Have you tried any of these products? Leave me some suggestions in the comments as to what I should try next because as you all know, my beauty wish list never seems to end ;)

post signature

Summertime Moisturization

Moisturizing always seems to be the most talked about topic of discussion during the winter months, but I'm here to remind you that soft, smooth skin is needed now when you're finally able to bare those arms and legs! Sure, your skin might go through its driest patch during the wintertime but it's so important to remember that even in the heat and humidity, your skin is in desperate need of some moisture - albeit a much lighter version of it!
I love slathering on a thicker body lotion when it's cold out and I feel extra dehydrated, but during the summer, you really don't want sticky limbs when getting dressed to walk around in the heat. For that reason, the Vaseline Spray & Go Moisturizer in Cocoa Radiant is my absolute fave. Not only is it the easiest moisturizer to apply (hello, all you do is spray it!) but it gives the right amount of moisture without feeling overly heavy. It smells amazing and there is no greasy feeling. This is an all around winner for me - and you can use it in the winter too! 

Hand cream cannot be forgotten in the summer! Whether it's from washing your hands excessively from tons of outdoor activities or from being out in the sun too long (remember that SPF people!), your hands need some moisture back in. I'm the biggest fan of the L'Occitane hand creams. These smaller sizes are perfect to carry around in your purse without so you don't forget to reapply and they come in the most amazing scents so there's bound to be something you love. I have the original Shea Butter scent and it is great for people who are a bit sensitive to harsh perfumes. You know what I'm talking about when you put on anything from Bath and Body Works and the entire building can smell what you're slathering on haha! The smallest amount of this will go a long way. 

Last but not least, your face! I have combo/oily skin which definitely leans more towards oily during the summer months. There is nothing worse than having your face look like an oil slick midday and if you've started off with a greasy moisturizer, no amount of powder or finishing spray will save your life. So say hello to the lightest feeling moisturizer ever: Origins Ginzing. As you can probably tell from the photo, this bad boy is on its last legs so you know I've thoroughly enjoyed it. This is a gel moisturizer but it doesn't leave your skin begging for more - it leaves it feeling super refreshed and non greasy for the rest of your makeup to sit on top of. My only complaint is that it doesn't have SPF which is essential but all in all, it's really great! 
Moral of the story? Just because it feels like the sun is about to burn your face off, does not mean that your skin isn't in need of some moisture. Smooth skin is essential all year round! 
post signature

What's On My Face #4: Matte Eyes


Yet another neutral look from me, surprise surprise. I'm really not into lots of colour anywhere other than my lips, so this look is natural and just enhances what you've got. When you want to look polished and not over the top, a good staple matte eye is the way to go and it is so easy to create with the Urban Decay Naked Basics (which I'm in love with!). This look is quite to throw on when I'm in a hurry and there are a few reasons why!

In terms of base, there isn't anything very new here except for the fact that I've been skipping liquid foundation on chill days and going for some NARS Creamy Concealer on areas where I need it and blending it out with my Real Techniques Contour Brush. It's a light base that covers any redness without making my face feel too clogged up with makeup. To even out my skin and give me a little bit of extra coverage, I applied the MAC Mineralize Skinfinish Natural in Medium Plus all over with a fluffy powder brush. As always, I can't put down my Tarte Amazonian Clay Blush in Tipsy so a good sweeping of that was a must! Before heading off to tackle the eyeshadow portion of the look, a girls gotta get dem eyebrows in check and y'all know how I feel about the Hourglass Arch Brow Sculpting Pencil in Dark Brunette - love!

Yes for matte eyeshadows! I'm loving the naturally defined eye look recently and the Naked Basics palette is quickly becoming a go to for no fuss eyeshadow. I took Foxy under my brow bone and Venus in my tear duct. Then with a shader brush I took Naked 2 all over the lid. I usually use this as a crease colour but I wanted to have a slightly more smoked out look. Since the Naked Basics doesn't offer a warm transition colour for the crease, I went into my Coastal Scents 28 Neutral palette, which I honestly always forget I have, and took a mix of the 4th and 5th shadows in the 2nd row through the crease to add some warmth and definition to the eye. I wanted a little bit more drama so with the shade Faint from the Naked Basics palette, I deepened the outer corner. That's eyeshadow done. A quick swipe of the Stila Stay All Day Liquid Liner and some L'Oreal Telescopic Mascara and the eyes are done! 

Finishing off the look, I wanted a lip colour that was slightly sophisticated looking and a neutral shade that would just add to the naturally enhanced look I was going for - MAC Modesty was the way to go. This lipstick was one I bought on a whim but I really love it and think it's a shade everyone should own. That's it, simple and easy. 

post signature

Faith Friday: Life NOT According To Plan

original source via Marjorie West


I'm a planner. With anything and everything in life, I like having clear guidelines and an action plan. I love steps and knowing what I want the end goal to be, but sometimes, we can't always have our way. We can plan, plan, plan all we want but God will either say yes or no, and as hard as it may be we have to accept either one. 

Here's where I think the problem lies. While we ourselves think our minds are capable of coming up with the most beautiful, idyllic situations, God's mind can come up with things that you can't even imagine. I mean, just think about the fact that He created the entire universe. That takes quite a bit of creativity huh? There's just one thing we have to be alright with: things could get messy! Our minds fabricate a pathway to an end goal that usually has little to no road bumps or mishaps. It's all smooth sailing. God on the other hand can work in somewhat messy situations. You don't have to be perfect or have a perfect path to get to the right endpoint for you. God is more than capable of taking you where you're at, helping you along a few hurdles here and there, and bringing you out on the other side. A side that you didn't know existed. 

Just think about those moments in your life that seemed insignificant. Moments that seemed like just that, another moment in time. Give it a little while though and some of those seemingly insignificant moments turn into moments that change your life. Not even on your best day could you have imagined things turning out the way they did. That's where I see the beauty of who God is. He can take the simplest of moments and make them life changing in the best way possible. 

So maybe today didn't go according to plan. You wanted to go out, but you lost your transit card (happened to me the other day!), you thought you'd aced that test but instead nearly failed it, you had your life mapped out with someone but they turned out to be the wrong choice for you.... it happens. However big or small the detour is, there's a reason for it. The best times in life, where you get a chance to really challenge yourself, are when things don't go according to plan and you're left to take it as it comes. Your move! You could sit there for days thinking of why you didn't get your way and what you could've done differently. But the truth of the matter is that making the best of every situation is necessary for your growth. Realizing that you can make all of the plans you can come up with, but in the end, His plans for you will be so much better. Yes, this requires patience, something we don't like to have, but the most beautiful things can happen when life doesn't go according to your plan, but in His! 

"In their hearts humans plan their course, but the Lord establishes their steps" Proverbs 16:9

This isn't to say that all of your dreams and plans are horrible and completely off target. Just know that the specifics are something He'll take care of and if you do your part and "commit to the Lord what you do" (Proverbs 16: 3) He will establish your plans! 

Have an amazing weekend! Xo 

post signature

NOTD: OPI Tickle My France-y


As much as I love fun, bright nails in the summer, sometimes it's nice to tone it down and choose a neutral polish that'll pair well with any crazy combination of colours you might be wearing outfit-wise. Lately, my favourite pick for that has been OPI Tickle My France-y. 

I've been obsessed with Essie polishes for the past while but I thought I'd go back to my tried and true OPI polishes for this gorgeous shade! I remember seeing this when the France collection came out years ago and never picking it up. Although it is a late addition to my nail polish collection, it's quickly becoming one of my favourite slap on and go polishes (much like Essie Mademoiselle has been for the past year!). 

The formula of this is creamy and applies like a dream. Two coats is all you really need! This is very much a colour that gives your hands that sophisticated look - are you following along? I know it may seem strange but it just looks really polished while adding a bit of colour, unlike very pale pinks do. I think I'll love this even more when Fall comes in! In terms of dupes, it's very similar to Essie Ladylike although Ladylike is definitely a bit more purple. So if you have one, you really don't need the other! 

Any OPI polishes you're loving? I just picked up The Thrill of Brazil and it might be my new favourite red!
post signature

Beauty Haulin': Birthday Edition

Cutting down on beauty purchases seems like the type of thing every beauty obsessed girl says she'll do... but never gets around to. Since my birthday passed and I had an excuse to check some things off of my "To Try" list, I picked a few things up, tested them out, and now I'm ready to give you guys a sneak peek at some products that will surely be featuring on the blog in no time! 

While buying lipsticks and eyeshadows is usually what ends up happening, we can't forget to focus on the tools that make application a breeze! There were two things high up on my list, the Beauty Blender and the MAC 217 brush. I must say, it took me way too long to test these out. Applying foundation with a damp Beauty Blender gives the prettiest finish and really does give an airbrushed effect. The only issue I've had with it is that some of my foundations have stained the sponge which really bothers me, but there really wasn't any way of knowing which liquid foundations would do that more than others. Other than that, the Beauty Blender is awesome! Alright, now don't get me started on the MAC 217. Honestly, if you need a "do everything" brush, then this one is probably your best bet. Great for a wash of colour all over the lid and Iincredible for blending in eyeshadows. Highly, highly recommend this! 

Onto the beauty products. The eyeshadow loving girl inside of me is finally out and was looking to expand her horizons. While a Naked palette was very tempting, I thought the Naked Basics would serve me well especially because I needed more matte eyeshadows to work with. This really doesnt disappoint and it gives you the versatility you would want in a palette. Next is another Amelia Liana recommendation: Sephora's Cream Lip Stain in 01 Always Red. If you're looking for a matte red lip that will not budge, even when you're eating pizza (I know from experience...), then you've found your new best friend! Perfectly vibrant, smooth, lightweight and incredibly long lasting. This. stuff. rocks! 

Last two things were thrown in on a whim, but mostly the Urban Decay Triple Threat Eyeliner Set. You know how the checkout at Sephora always gets you with the cute minis and special offers, and this time was not exception! I was browsing around and this little set caught my eye instantly. It seemed perfect because I'm not a huge eyeliner person so getting a smaller size and getting three very useful shades (Black, Grey and Navy) was a no brainer - had to get it! I've used the navy shade so far and I loved how smooth the pencil was, as well as the pigmentation being through the roof. Last but not least, the Elizabeth and James Nirvana White perfume. I had been wanting this since I first took a whiff of it while walking around Sephora but I really wasn't looking to buy a full sized perfume just yet, so the rollerball seemed like a good idea. In hindsight, it's probably not the best value for money but it is really convenient. In a few months time I'll most likely be trading it in for the full size! 

That's it for this years round up of birthday beauty purchases. Really didn't go too crazy but in reality, I think I bought myself enough early birthday presents for them to count! Anything new beauty wise you'd like to recommend? You know I'm always open to suggestions!

post signature

Lip Product Addict Tag

Have I mentioned that I have a love of lip products on my blog enough yet? Because if I haven't, today would be the perfect day to do so! The lip product addict tag started on YouTube by some of my faves, Amelia Liana and EssieButton, and it pretty much sums up my life in a series of questions. I may still do a video about this but these were just too good not to share now. So, without further adieu, here are my picks!

1. Favourite treatment/balm?
This category goes to The Body Shop's Aloe Lip Treatment, hands down! Coincidentally, it was something I discovered through EssieButton and it is a serious life saver if you have really chapped lips. A bit of this overnight, and whatever your lips were dealing with will be a thing of the past. It's quite a thick balm so it's amazing to put on a good layer of this before going to bed! 

2. Best eye-catching red?
I thought about this and out of all of my red lipsticks, the CoverGirl LipPerfection Lipstick in 305 Hot is the one shade that I consistently get asked about. There's just something about it that is perfect for summer and bright enough to really make your face look super alive. absolutely love this colour!

3. Best luxury & best drugstore?
I'm gonna answer this as brand focused rather than a specific product! For luxury, YSL is just the most luxe and gorgeous stuff lip product wise out there. I may only have one in my possession (the Rouge Volupte Shine in 15), but just taking it out of my purse to reapply makes you feel all posh and fabulous haha! Definitely hoping to add another one to my stash soon. Drugstore pick is definitely Revlon. They always come out with the best formulas and shades, and there is seriously something for everyone. My favourite things by them are the lip butters and the matte balms, so good!

4. Best MAC lipstick?
This is a no brainer. As soon as I read the question I knew it had to be MAC Peach Blossom! It's the shade that goes with everything and glides on like a dream. Perfectly neutral but with enough peachy pink to brighten up your face. I'm almost certain that once I finish it up, which seems like it'll be soon, this will be my most repurchased lipstick... like ever. 

5. The most disappointing?
Most disappointing would have to go to the NYX MegaShine gloss in Nude Peach. This is really strange because I love the shade Beige (which is in fact as pink... #awkward) but I think the shimmer in this particular shade is the problem. I love basically every lip product I own but this one I will need wear because it goes on gloomy and downright horrible on the lips. While the MegaShine range isn't bad a whole, I think the shimmer shades are not ones to go!

6. Liner - yes or no?
Currently a no. I only have one lip liner in my makeup collection and I think I've only grabbed for it once or twice. The vision in my mind of lip liner reminds me of those girls with the crazy overdrawn lips... so not a good look. Maybe finding a good invisible lip liner would work best for a newbie like me! 

7. Best gloss?
Not gonna come as a surprise I'm sure. Clarins Instant Light Natural Lip Perfectors. Perfect. Smooth. Feels like a balm. Best. Lipgloss. EVER. Nuff said. (and if you want more said, here's my review!)

8. Something extra!
I thought about what I'd include in this and the one thing that came to mind was sharing my favourite bolder lip choice for the summer! Orange lips are a huge trend and MAC Morange is the way to go. Super pigmented and creamy so your lips won't dry out but the lasting power on this one is seriously great. It's definitely one of those lipsticks to pull out when you wanna feel a little daring and fun! 

post signature

On The Hunt: ZARA Sale

One of the things I love most about my birthday being around this time is that all of the best semi-annual sales re going on, so it's the perfect time to spend some of that birthday money. But even if it's not your birthday, there are some pretty amazing things at a fraction of their original price and the store that is really calling my name is ZARA. I've never been into shopping at ZARA, but oh dear, I went in the other day and basically fell in love with everything my eyes caught a glimpse of. Here are some of my favourite pieces! 

Side note: Insider's tip from a friend who works at ZARA: Go on a Wednesday because they lower their prices every Tuesday (shhhhh, don't tell anyone I told you!)
zara sandals
Clockwise: Red Heels (stunning!) // Leather Sandals // Woven Sandal  // Blue Heels
I have this really weird obsession with high heeled sandals lately and ZARA is literally killing it with these ones! I'm looking to branch out from my usual black heels so these are a little bit more fun! All of them are on sale too, so #score. 

The list of clothes that I'm drooling over is way too long but these are a few of the things that caught my eye. I've been staring at that coat in the ZARA window since like March so hopefully I can buy it on sale - so pretty! And as you can see, I still have to include some black clothing items because, well, black is the new black!

Are you eyeing up anything in the ZARA sale? I'd love to see what you pick up!

Side note: Happy Canada Day to all my fellow igloo livin', maple syrup lovin', poutine eatin' Canadians, eh! ;)

post signature

What's On My Face #3: Feline Flick


I'm long overdue a What's On My Face post so here is another look for you guys! My makeup tastes are always very neutral and simple but lately I've been loving using eyeshadow on a more regular basis and even (brace yourselves...) doing a bit of a feline flick on the outer corners. I know, I know, crazy time for Miss Glorious Peonies!

All jokes aside, I really have to hand it to Amelia Liana who solved my cat eye liner troubles. All you need are Post It Note flags and you'll be a pro in no time. (Here's a video where you can see how she does it!) Not only does it create a barrier for your eyeshadows, but it makes getting a clean line for your eyeliner so simple! Hopefully this trick can help you guys out because it definitely is life changing. 

On my face, I kept it pretty simple as usual, and went in with Chanel Perfection Lumiere Velvet in B30 and then used my beloved NARS Radiant Creamy Concealer in the shade Ginger... you know the deal! To give me a bit more of a bronzed look, I swept NARS Laguna Bronzer around my temples, on my cheeks and down my jaw. Then with a duo fiber brush I went in with the Bourjois Cream Blush in 01 which is perfect for summer because it's a cream but it turns into a powder, ensuring a long day of flushed cheeks. Then I took a bit of the Clarins Complexion Perfector in Champagne Shimmer on the tops of cheekbones (love this stuff!). 

Onto eyes, I did my brows with my trusty Hourglass Arch Brow Sculpting Pencil in Dark Brunette, which should come as no surprise to you because this stuff is the only thing I use! From the Stila In The Light Palette, I took Bare over the lids and to the brow bone, then Bliss along the crease, and then took the tiniest bit of Sandstone in the outer corner to deepen up the colour. For my liner I used Stila's Stay All Day Liquid Liner in Intense Black and created a bit of a wing on the otter corner. Loving this look! Finished it off with a few coats of L'Oreal Telescopic Carbon Black, and finito!

To finish off the look, I mixed Mac Modesty and Lovelorn for the perfect soft pink lip and that's it! Super simple but a little bit extra effort than going in with my Everyday Makeup (which I did a video about here!)

Hope you're having a great week so far! 

post signature

The Best Do It All Eyeshadow Palette: Stila In The Light

A few months back I wrote a post about eyeshadow palettes since I was looking to find a good neutral one that could serve me well. After quite the crazy excursion to track down one palette, it finally came home with me and for the last 6 months it's the only thing I reach for! The Stila In The Light Palette is a serious winner, here's why! 

Alright, here are the basic things you need to know. This palette can be found at Sephora for $50 CAD and it comes with 10 eyeshadows (6 shimmers, 4 mattes). Not only that, but the palette also comes with a full size Stilla Stay All Day Smudge Stick in Damsel which is one of the best things they could've added (I really dislike those sponge applicators they always include which usually get thrown away!) The colour selection is neutral but I find that the variety is great to cover all the looks you'd want to create from daytime to night time. 


Packaging wise, I'm not the biggest fan of the cardboard thing but I make it work. It would definitely be better to have a more solid, tin like the newer Urban Decay Naked Palettes though! It does come with a mirror which makes application a breeze if you need to do your makeup somewhere without a mirror (traveling perhaps?) and the inspirational quote is always nice to reflect on as you get ready ;)

When trying to choose a neutral palette, I was obviously directed towards the Naked palettes but this is why I think the Stila offering is better. I think one of the most important things in a palette is to have a good mix between mattes and shimmers and Stila really drivers on that front. Sometimes you really don't wanna go all glitter ball on the lids, so being able to use a matte transition shade on the crease or having a matte dark black shadow to deepen the crease or use as eyeliner is fantastic! The quality of the eyeshadows I think is very comparable to the Urban Decay ones, from what I've felt in swatching them, but I will say that Urban Decay did a little better in so much as the shimmer shades are a bit creamier and give off less fallout than the Stila ones but that could only be said about the shade Kitten. 

I really like how the palette isn't just filled with varying brown shades, since it does include a gorgeous gold, a coppery shade that would work beautifully on green or blue eyes, and a vibrant greyish navy shade. As you can see, there are endless amounts of looks you can create and that would pair well together because I find the shadows in this palette are really complimentary to each other. But, if you're stuck on what looks to create, then there is always the little book with ideas and steps for eyeshade application! 

The Smudge Stick in Damsel is a great addition to the palette and I've loved using it! The colour is a dark black brown and it can be used to add definition but without the harsh effect that a straight up black liner would create. It's really smooth and creamy so it's definitely not a pencil you could do a precise cat flick with, but as the name suggests, it's perfect for smudging across the lash line and it really doesn't smudge at all, which is rare for me to find since all eyeliners end up on my cheeks (whoops!) 


Since I've used this palette to death in the last 6 months, I think I'm gonna write up a post about different looks you can create with it, just to give you ideas! All in all, the In The Light palette is a great starter neutral palette for anyone and it's versatility is incredible. Love all of the options I get with this little guy. 

Side note: Any other eyeshadow palettes you think would be a good addition to my makeup stash? My birthday is this weekend and there may need to be an eyeshadow palette included in the birthday wish list ;)

post signature
Blog Content. © Glorious Peonies | A Lifestyle And Beauty Blog . Blog Template All rights reserved. © Maira Gall.